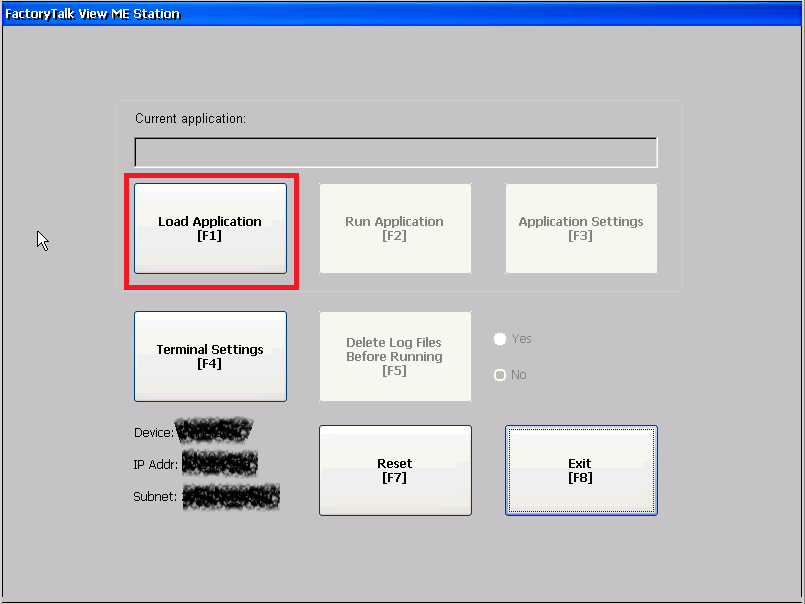
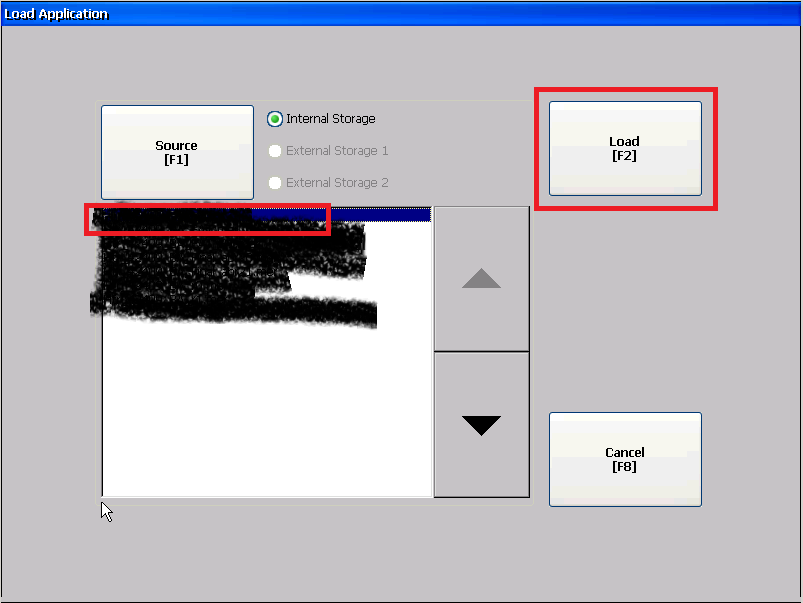
PanelView Plus runs on Microsoft Windows CE.
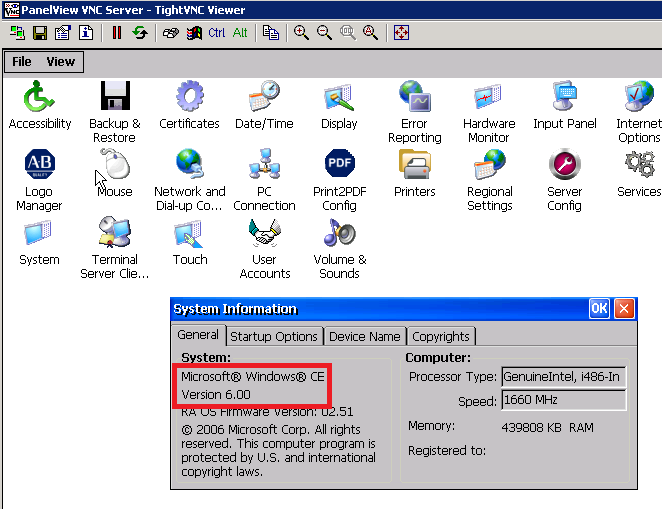
You have to exit the Panelvel Application and get into the Windows CE desktop environment.
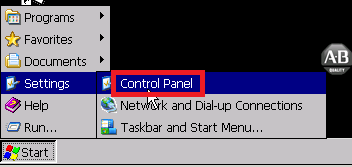
Once you are on the Windows CE Desktop, click on Start->Settings->Control Panel
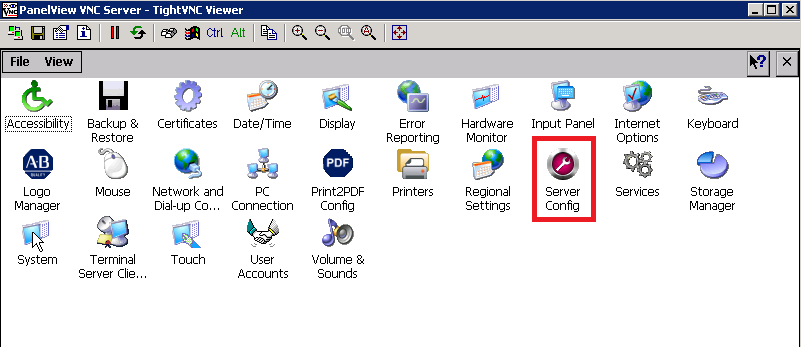
Double click on the “Server Config” icon.
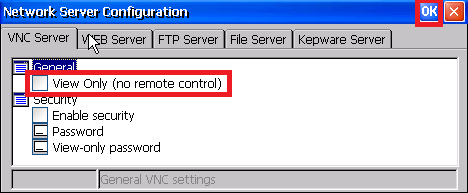
Ensure that “View only (no remote control)” check box is unchecked. Unchecking allows remote VNC client to view and write from their remote session. Clik on “OK” (top right-hand side on the Network Server Configuration popup window) to accept the new changes.
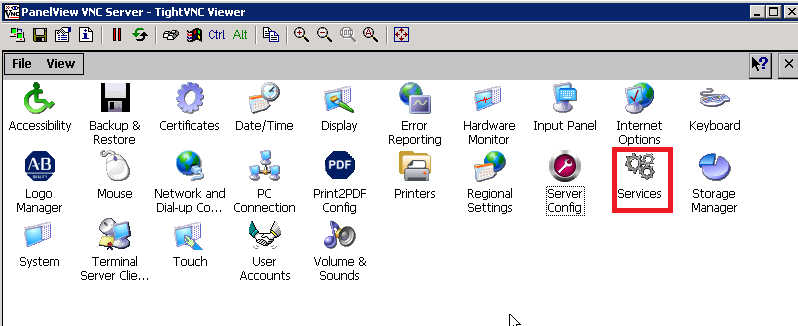
Double click on the “Services” icon.
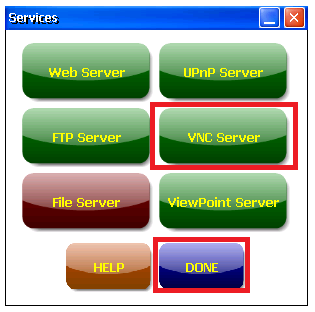
Click on “VNC Server” (which will turn the button green; as shown below). After that click on “DONE” button.
Click on the “X” to close the “PanelView VN Server – TightVNC Viewer” window.
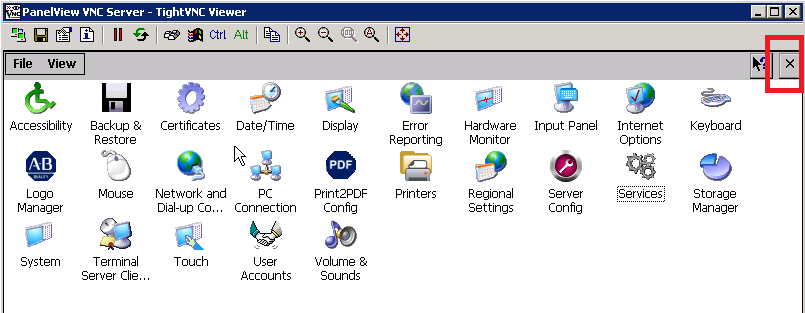
To launch the FactoryTalkView ME application again, click on the “FTViewME Station” to launch the FactoryTalk View ME Station Configuration menu

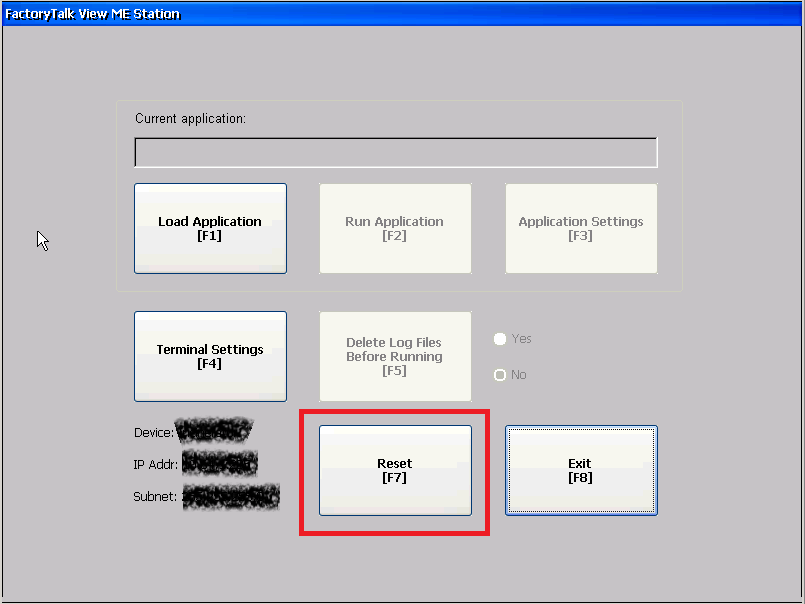
Click on the “Reset [F7]” to power cycle the PanelView Plus.
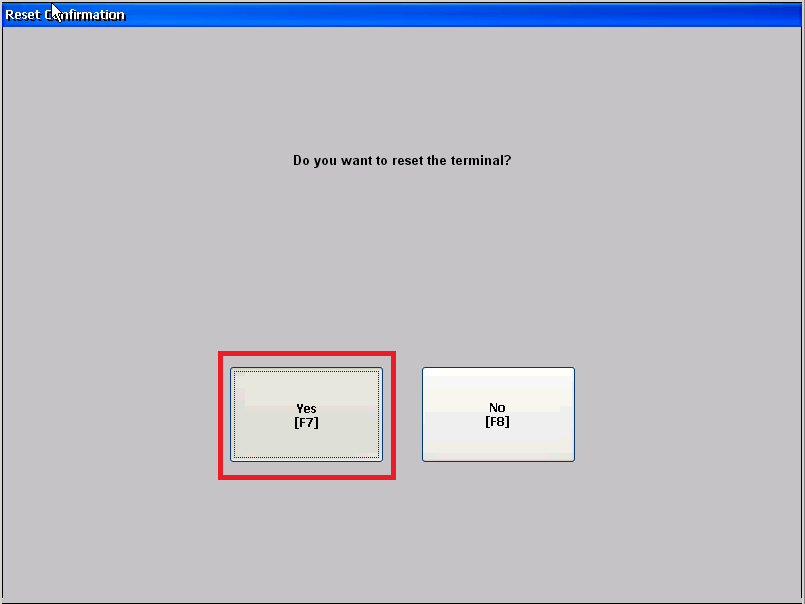
Click on “Yes [F7]” to power cycle the PanelView Plus.
You can also load specific Runtime appliction file (.mer) in the PanelView. You will have to restart/power cycle the PanelView after loading the Runtime appliction file (.mer).
