")
This is going to be an illustrative tutorial on how to configure the AI card on a Compact Logix.
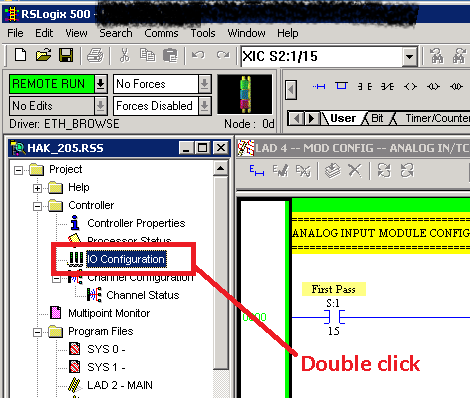
Double click the “Configuration” (as shown below)
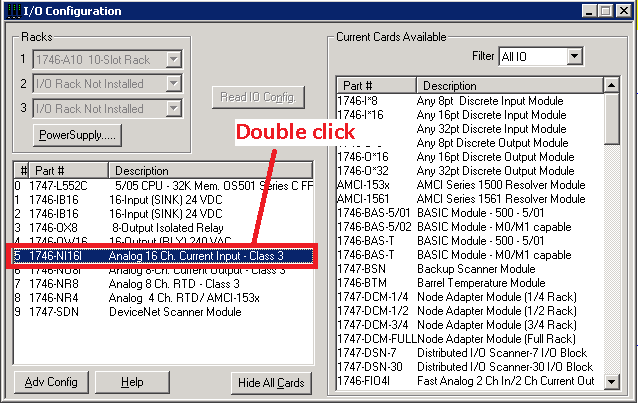
If you don’t have the AI card, add one, or double click to configure it. For our example, our AI card is in slot 5. See screenshot below.
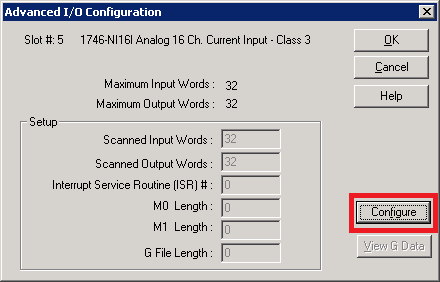
From the “Advanced I/O Configuration” window, click on “Configure” button. Note that when I did the screen capture, I was online with the controller therefore “View G Data” button is disable.
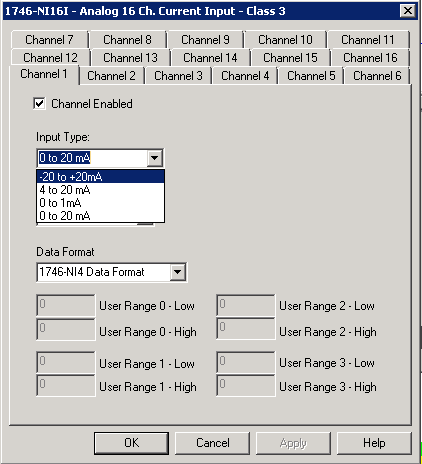
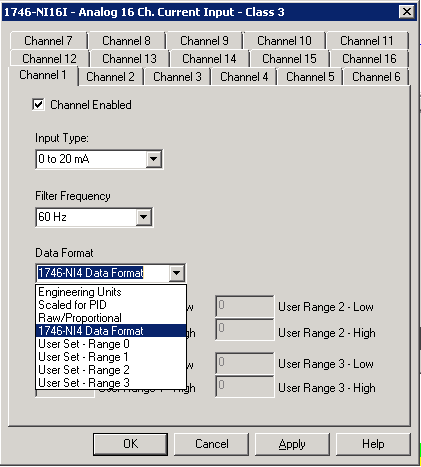
Configure the each of the channel in the AI.
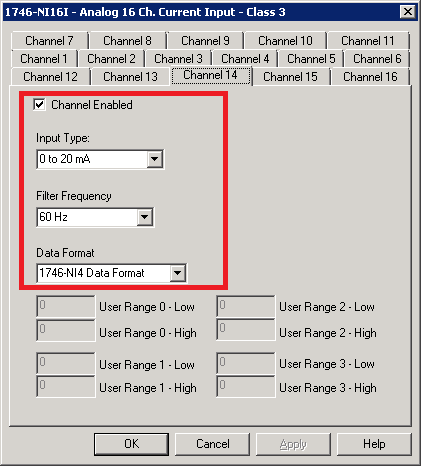
“Input Types” that are available are -20 to 20mA, 4 to 20mA, 0 to 1mA and 0 to 20mA; as shown below.
“Filter Frequencies” that are available are 6Hz, 10Hz, 20Hz, 40Hz, 60Hz, 80Hz, 100Hz and 250Hz
“Data Format” types are as shown below.
Add a logic to map IO from Slot 5 (I5) to a working address in the PLC (N11); for our example.
Note that Rung 0001 is to copy field device I/O into an address in PLC. The logic shown below will copy values from I5:0 to N11:0, I5:1 to N11:1, I5:2 to N11:2, and so on.
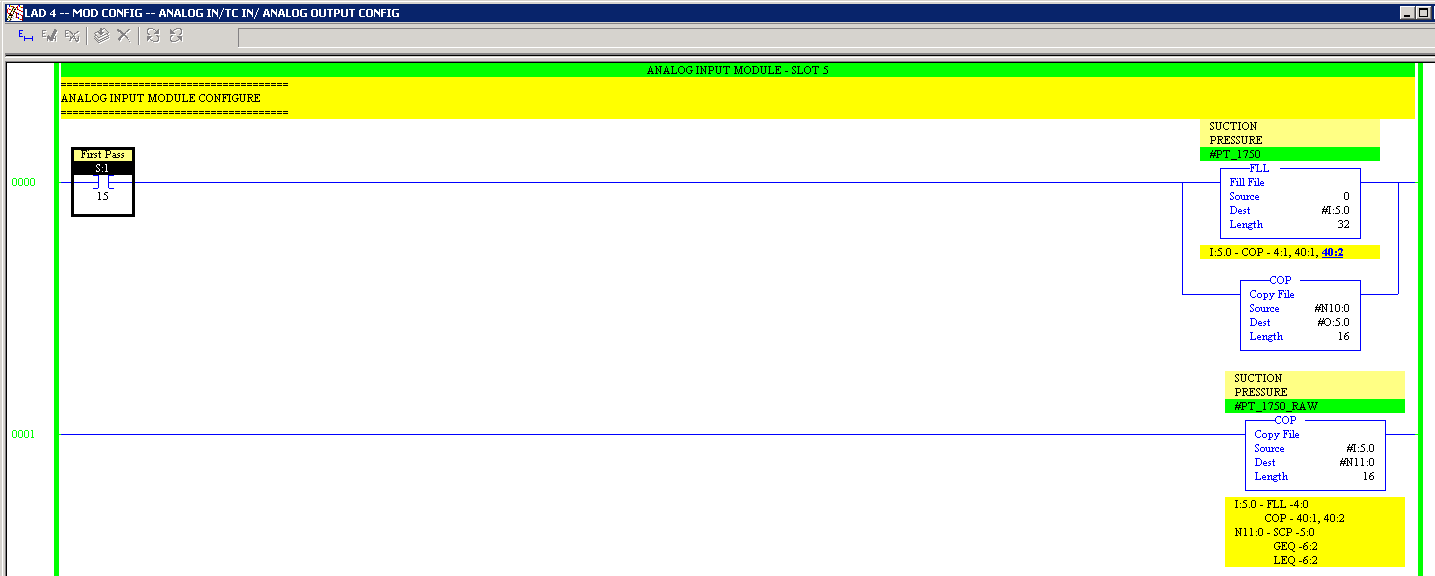
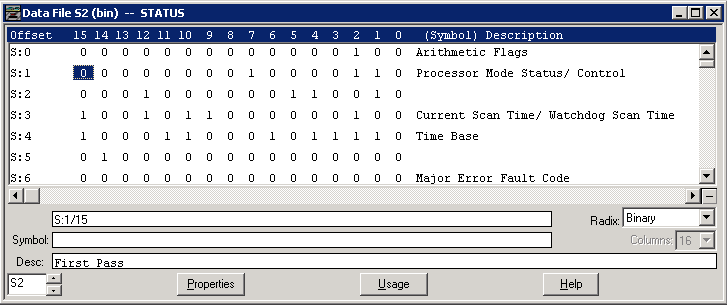
Note that Rung 0000 (as shown above) is for initialization of the I/O in Slot 5 and that is only ran once when the logic starts. Which is triggered by the S:1/15 address (First Pass bit).